Of all the trips we’ve taken, and of all the adventures I’ve written about, the most visited page here is the one describing the rain kilt. (Kilt 2.0 ) If you’ve read that article, then you know I’m a big fan of the rain kilt. Since the first version was field tested back in July of 2016, and a major revision shortly after that first trip, I’ve used the kilt exclusively in all my travels.
Use any piece of gear and before long you see room for improvement. That has definitely been the case with the kilt…there has been a constant evolution. The beta version proved the concept in some truly nasty conditions. However, it turned out to be too square and didn’t overlap enough. Version 2.0 was an improvement, but consisted of two pieces which required extra time and effort to sew. And even though it only weighed 8 oz, I was interested in using some lighter weight materials as well as tweaking the design a bit more.
Version 1.0 … note the almost square shape. Slightly more colorful and slightly more flared version 2.0
Before retirement, one of my co-workers happened to be a professional seamstress. We had several interesting conversations about design possibilities, and with her help, I came up with a new design that not only fits better, but is easier and quicker to sew.
An early version of 3.0 One piece and even more flare. For this version I used 1.1 oz Silnylon. Final weight…1.95 oz!Feeling very manly in my rain kilt (its not a skirt!)
I’ve now made three kilts using the new design, and with each one I’ve made some small, but significant changes. In a few weeks, I am excited to be joining four of KB’s “sponsored” athletes. We will be field testing the latest and greatest to come out of the KB Skunkworks on the John Muir trail in California. Based on the feed back I receive, I will incorporate any final design changes into the pattern. If anyone is interested, I’m happy to share information on making our own. Seize the Carp!
I will confess to being envious of my “manly” friends when they talk about their metal working, welding, car engine rebuilding exploits. “I sewed some stuff” doesn’t have quite the same cachet. In 1830 Barthelemy Thimonnier, a French tailor, invented a machine that used a hooked needle and one thread, creating a chain stitch. It wasn’t quite recognizable as a sewing machine, but it worked well enough that Thimonnier planned to use it in his factory to make uniforms for the French army. French tailors caught wind of this turn of events. Fearing they would lose their jobs, they rioted and burned down his factory – with Thimonnier inside. Given the full-contact, life and death consequences, clearly sewing is not an activity for sissies. In fact, given its history, might one might even consider it an “extreme sport?”
Back in the late 70’s I was beginning to explore outdoor activities that often required specialized gear. Since I had very little money, I decided to join with those brave men and women before me who risked life and limb to sew garments. My first effort was a pair of down booties from Altra Kits from Boulder, CO. Next, I moved on to some really basic nylon shell jackets and pants. You have to remember this was in the era of wool – when the 60/40 nylon/cotton ‘mountain’ parka was cutting edge. During a winter trip in the Boundary Waters Canoe Area, I had the chance to show off some of my handiwork. It was probably Dan-Boss Backer who said, “Wow! That kicks ass!” Hmmm. Kicks ass…Kicks Butt…KB! Thus was born KB Gear, and now many years later, with tongue firmly in cheek – KB Extreme Gear!
My first project – still in use 39 years later.
The basic straight stitch I learned on those first projects is just about the only stitch I know – or really have needed. With that basic knowledge, I’ve managed to churn out a variety of gear – some of it actually useful and usable. Gaitors, windpants, windshells, waterproof overmitts, sleeping bags, ultralight tarps, backpacks, kilts and so on. Over the years, I’ve come up with some of my own designs, but for the most part I follow patterns. Some patterns were specifically designed for outdoor use. Others have been adapted or modified from patterns meant for other activities. One of the most important lessons I’ve learned over the years is the value of a well designed pattern. So, in an effort to encourage you to learn this most dangerous skill, I’d like to offer handful of my favorite patterns and provide some resources.
Green Pepper Hood. Overall I’m not a real fan of Green Pepper patterns. While they have a huge variety of outdoor related patterns, the ones I’ve used are overly complicated, and seem to focus a bit more on how something looks than in how it functions. The one exception is this hood. It is well designed, relatively easy to sew, and VERY functional. With a strip of velcro around the bottom, and on the collar of a jacket, you can add a great hood to any jacket.
I am a huge fan of Controlled Exposure. They only have a few offerings. Unlike some of the Green Pepper patterns, whoever came up with these clearly spent time outside. They understood the kinds of features that make gear not just “good” but “great!”
CE55 Mountain Pant
CE55 Mountain Pant.
CE65 Fleece or Stretch Pant
The CE55 Mountain Pant design is brilliant. The Bib straps wrap around and attach in the front of the pants, allowing one to easily drop trou when one must. Full zips allow easy on/off as well as good ventilation. The pattern is easy to customize to add features and to ensure a perfect fit. For years, these have been my go to shell pants for climbing and skiing. I actually prefer these bibs to a pair from Arteryx! The CE65 stretch pants are my 2nd favorite CE pattern. Super easy to make. Both Sharon and I have pairs made of heavy weight, Polarguard Powershield fabric. Super warm, windproof and highly water resistant.
Folks in Norway have a saying “There’s no such thing as bad weather, just bad clothes.” I doubt they are the first, or only people with that opinion. The weather is just as pleasant in nearby Finland, and Shelby offers a wonderful variety of products and patterns designed to help folks cope.
KB Gear Abisko #1
Its a safety issue. In case of trouble, this jacket could be seen by the International Space Station
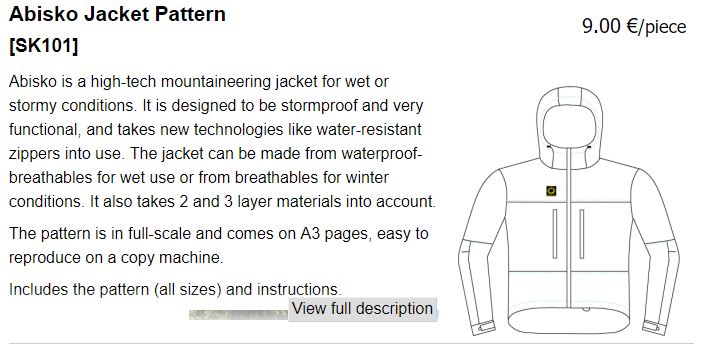
I came across Shelby while surfing many years ago, and was intrigued by their designs – especially for their “Abisko” jacket. Getting this pattern shipped from Finland was more expensive than the pattern itself, but well worth it. This jacket pattern is by far my favorite. There are probably a few dozen of these floating around among family and friends. It is incredibly well designed, and without too much effort will produce an excellent jacket. One of my favorite features is the ease with which you can customize the pattern to fit any size or purpose. I have one made of lightweight material designed specifically for running. I have two jackets made from the brilliant “Eye Pollution Yellow” material for visibility when motorcycling. One is fitted for moderate temps, one is extra large to layer over bulky cold weather riding gear. I’m currently working on one with a fleece liner and Gore-tex outer shell to be used as an all around winter jacket. Some have integrated hoods, some make use of the Green Pepper hood.
I’m pretty sure Arcteryx is not worried about KB Extreme Gear eating into their market share. I’m never going to compete with the kind of gear they produce – but that’s really not the point. There is a tremendous amount of satisfaction spending time outside, using gear designed, made, repaired, or modified with your own hands…at a fraction of the cost. With the materials and knowledge available on the internet, it is amazing what you can do once you set your mind to it…and this extends beyond sewing/modifying/repairing your own gear. There is also something satisfying – and healthy – about tuning your own skis, making your own “freezer bag” backpacking meals, coming up with your own adventures and planning your own trips, etc. But I digress. I hope you enjoyed this little walk down the KB memory lane.
Resources
https://ripstopbytheroll.com (Although I just recently found this site, these guys are seriously good. They are now my favorite site for fabric and I refer them to anyone interested. They have lots of high tech, hard to find outdoor material at some seriously good prices. I definitely suggest checking them out.)
Lenny Pepperbottom likes to say that “Nature is neat!” It is indeed! However, nature can also be messy, and occasionally mean spirited. You were hoping for blue bird skies, but instead the skies open and you get rain in all its infinite varieties…drizzles, sleet, sheets, showers, streams, sprinkles, mists, monsoons…well, you get the idea. If you want to enjoy nature, then you need to be prepared. A rain jacket is an obvious, basic piece of equipment and there are plenty of excellent examples to choose from. And while it would seem to follow that rain pants are also an obvious, basic piece of equipment, I’ve been generally dissatisfied with all the pants I’ve purchased or made. So this past year I decided to step outside the box and try something a bit different…a rain kilt (its not a skirt). Could 2 1/2 million Scottish men be wrong?
I did a fair amount of research and came up with several commercially available rain kilts…you can check out a few variations here.
I felt like there were some good ideas, but nothing really blew my skirt up (pun intended). I also checked out some homemade versions, and again found lots of good ideas. Since I have a garage full of fabric and some sewing skills, I thought I would see if I could come up with my own design. KB Rain Kilt 1.0 was finished in time for an extended backpacking trip in the San Juan mountains last summer. During that trip we experienced full on monsoon activity, brief passing showers, as well as cool temps. I came away from that trip 100% sold on the benefits of a rain kilt vs traditional rain pants. I did feel that there were some improvements to be made, and they were incorporated into version 2.0 pictured below. This kilt was trail tested and approved on our 9 day John Muir hike later in the summer.
The “camouflage” version of the KB Rain Kilt 2.0. In case of emergency the kilt can be used to signal the Int’l Space Station
If you are skeptical, I would offer the following…
1. Biggest advantage…ease of use. Consider the typical scenario. It starts raining to the point where rain protection becomes desirable. With rain pants – drop pack, fish out rain paints. Find a place to sit down. Take off boots/shoes. Pull on rain paints. Put boots/shoes back on. Put on backpack. When it stops raining, drop pack, find a place to sit, take off boots/shoes, pull off and stow rain pants, put boots/shoes back on, put pack back on. Either that or just leave the bloody things on because it is too much of a pain to stop and remove them, and just deal with hot, clammy pants. With a rain kilt, grab the kilt from an outer pocket. Loosen waist belt. Put on kilt and re-tighten waist belt. That’s it. When the rain stops it is easy to remove the kilt and stow it away. Either that or just leave it on (see #2).
2. Comfort. If at all possible, I prefer hiking in shorts. Even with waterproof, breathable fabric (and I’m a big believer) I don’t like the feel of nylon on bare legs. My traditional rain pants (both commercial and home made) tend to feel clammy and constricting. By contrast, the kilt hangs loosely enough and offers enough airflow to prevent the annoying dampness.
3. Weight and utility. Less critical, but still important. There are some super lightweight versions weighing 2-3 oz. My 2.0 kilt is pretty beefy and weighs only 8 oz. By comparison my Mountain Hardwear pants are about 16 oz, and probably stuff twice as large as the kilt. I was also continually finding other uses for the kilt. For example, as we broke down camp in the morning, I found it convenient to lay out the kilt as a mini-ground cloth. I could sort gear and clothes and keep them dry from the morning dew. When it wasn’t raining, they added a surprising level of warmth.
The build. Based on my experience with version 1.0, I increased the flair to better match my stride length when walking. I decided on two pieces so that it hung more naturally and evenly. I’m 6′ 2″ so I decided on a hemmed length of 28″, that falls just below my knee. The hemmed width of each piece on top is 20 1/2″…the bottom of each piece is 33 1/2″. With the long velcro piece on top, the kilt can be adjusted to fit over shorts, or bulky layers. As can be seen from the 2nd picture, there is quite an angle when both pieces are sewn together. This may look strange when it is laid out, but when it is worn, it fits naturally. I do intend to tweak the location and angle of the two lower velcro strips. I have a good supply of Gore-tex, including some of the always fashionable “eye pollution yellow”, but you could use any coated fabric. Several enterprising folks have even used tyvek house wrap. Whatever fabric you choose, the sewing skills needed are pretty basic. It is definitely worth the effort. Nature’s Neat – and so are kilts!
Version 2.0.
The KB brand…now in its 38th year! And as always, Made in America! Just to be clear – I don’t actually make anything to sell. I just make stuff for myself, family and friends.
KB Rain Kilt 2.0…always fashionable, in any setting.